
Introduction
Starting with Arduino is easier than ever with a well-designed starter kit. These kits include the board, components, and often tutorials to get you from zero to blinking LEDs in minutes.
What Makes a Great Starter Kit?
- Quality Arduino board (official or reliable clone)
- Good variety of sensors and actuators
- Clear tutorials or project book
- Storage case for components
- Breadboard and jumper wires included
Top Arduino Starter Kits 2025
| Kit Name | Board | Components | Price | Best For |
|---|---|---|---|---|
| Arduino Official Starter Kit | Uno R3 | 100+ | ~€90 | Premium experience |
| Elegoo Uno Super Kit | Uno R3 Clone | 200+ | ~€40 | Best value |
| SunFounder Complete Kit | Uno R3 Clone | 180+ | ~€45 | Good tutorials |
| SparkFun Inventor's Kit | RedBoard | 50+ | ~€100 | Quality + support |
| DFRobot Beginner Kit | Uno R3 | 80+ | ~€55 | Educators |
Essential Kit Components

Must-Have Components
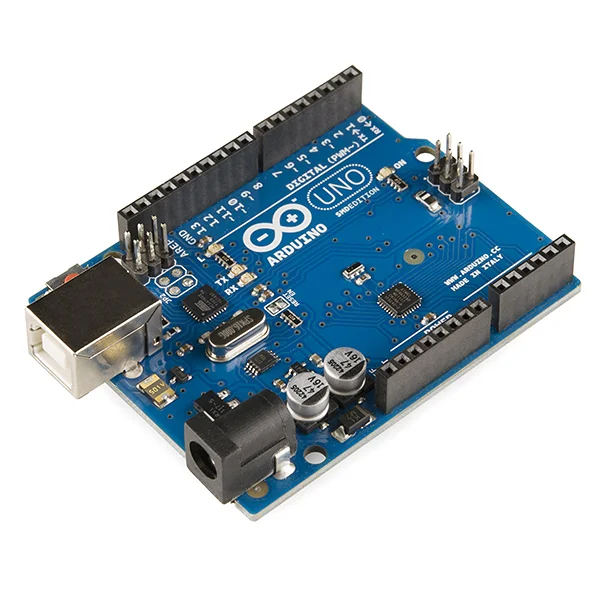
- Arduino Uno - the brain of your projects
- Breadboard - for prototyping without soldering
- Jumper wires - M-M, M-F, F-F varieties
- LEDs - various colors
- Resistors - 220Ω, 1kΩ, 10kΩ common values
- Push buttons - tactile switches
- Buzzer - for sound projects
Sensor Basics
- Temperature sensor (DHT11 or TMP36)
- Light sensor (photoresistor/LDR)
- Distance sensor (ultrasonic HC-SR04)
- Potentiometer for analog input
Your First Project: Blinking LED

Every Arduino journey starts with the Blink sketch. It teaches you:
- How to set up your Arduino IDE
- How to upload code to the board
- How digital pins work (HIGH/LOW)
- Basic timing with
delay()
// The classic Blink sketch
void setup() {
 pinMode(13, OUTPUT); // Built-in LED
}

void loop() {
 digitalWrite(13, HIGH); // LED on
 delay(1000); // Wait 1 second
 digitalWrite(13, LOW); // LED off
 delay(1000); // Wait 1 second
}
Using a Breadboard

Breadboard Tips
- Power rails (+ and -) run the length of the board
- Inner rows (a-e, f-j) are connected horizontally
- The center gap separates the two sides
- Use short, organized jumper wires
5 Beginner Projects to Try
1. Traffic Light
3 LEDs cycling through red, yellow, green with delays.
2. Button Counter
Count button presses and display on serial monitor.
3. Temperature Display
Read DHT11 sensor and show temperature/humidity.
4. Light-Activated LED
LED turns on when room gets dark using LDR.
5. Melody Player
Play simple tunes through a piezo buzzer.
6. Distance Alarm
Buzzer sounds when object is too close (ultrasonic).
Common Beginner Mistakes
Forgetting resistors with LEDs
Always use a 220Ω-330Ω resistor with LEDs or you'll burn them out!
Connecting to wrong pins
Double-check your wiring matches your code. Pin 13 in code = pin 13 on board.
Wrong COM port selected
In Arduino IDE, select Tools → Port → your Arduino's COM port.
Shop Arduino Starter Kits
Browse our Arduino collection for starter kits and components.
Ready for more? See our Arduino Sensor Projects guide.
Frequently Asked Questions
What is the difference between genuine Arduino boards and compatible clones?
Genuine Arduino boards are manufactured by the official Arduino company, ensuring quality, official support, and funding for Arduino development. Compatible clones use the same open-source design but are made by third-party manufacturers, offering similar functionality at lower prices. Both work identically for most projects, but genuine boards guarantee compatibility and support the Arduino project's development.
Do I need programming experience to start with Arduino?
No prior programming experience is required. Arduino uses a simplified version of C++ and quality starter kits include tutorials that teach programming concepts alongside electronics. The Arduino IDE is designed for beginners, and you'll find the community extremely helpful. Most people start with simple LED projects and gradually build their skills through guided projects.
Can I use Arduino for professional product development?
Yes, Arduino is widely used for prototyping professional products. Many companies use Arduino to develop proof-of-concepts and early prototypes before moving to custom PCB designs for production. The ease of development and extensive library support make Arduino excellent for rapid prototyping, though final products often use the underlying ATmega microcontroller directly for cost optimization.
What is the difference between Arduino Uno and Arduino Mega?
The Arduino Uno has 14 digital I/O pins and 6 analog inputs, suitable for most beginner projects. The Arduino Mega 2560 has 54 digital I/O pins and 16 analog inputs, providing significantly more connectivity for complex projects requiring many sensors, motors, or displays simultaneously. Beginners should start with Uno unless planning robotics or multi-sensor projects.
How long does it take to learn Arduino basics?
Most beginners can grasp Arduino basics within 2-4 weeks of regular practice, completing 10-15 starter projects. Achieving intermediate proficiency typically takes 2-3 months, where you can design custom projects independently. Mastery is ongoing - even experienced users continually learn new techniques, libraries, and applications. The key is consistent practice and progressively challenging yourself with more complex projects.