
Introduction
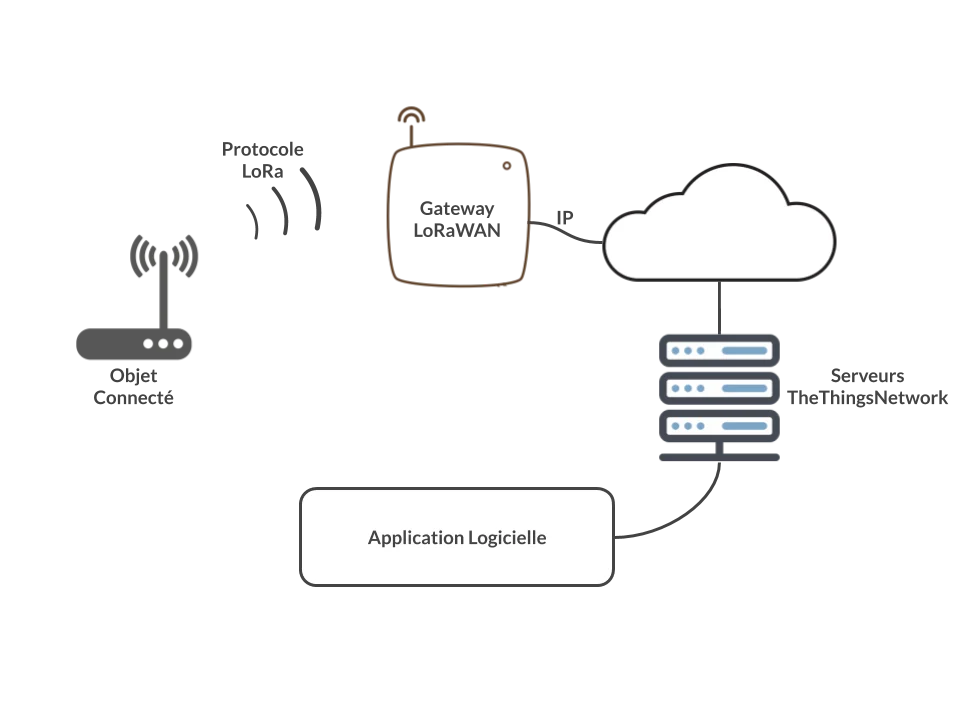
Setting up your first LoRaWAN gateway is an exciting milestone in building IoT applications. The Dragino LPS8 is one of the most popular gateways for hobbyists and professionals alike, offering excellent performance at an affordable price point.
What You'll Learn
- How to physically set up and connect your Dragino LPS8
- Step-by-step TTN (The Things Network) registration
- Gateway configuration and network settings
- Antenna placement optimization for maximum range
- Troubleshooting common connection issues
This comprehensive tutorial walks you through every step of configuring your Dragino LPS8 gateway to connect with The Things Network (TTN), the world's largest community-operated LoRaWAN network.
Hardware Requirements
| Component | Description | Required? |
|---|---|---|
| Dragino LPS8 Gateway | 8-channel indoor LoRaWAN gateway | Yes |
| Power Adapter | 12V DC power supply (included) | Yes |
| LoRa Antenna | 868 MHz (EU) or 915 MHz (US) | Yes |
| Ethernet Cable | For initial network setup | Yes |
| External Antenna | High-gain for extended range | Optional |
| 4G/LTE Module | For remote deployments | Optional |
You can find all necessary hardware components in our Dragino collection.
Gateway Physical Setup
Step 1: Unboxing and Inspection
Carefully unpack your gateway and verify all components are present:
- LPS8 gateway unit
- LoRa antenna (868 or 915 MHz)
- 12V DC power adapter
- Quick start guide
Step 2: Antenna Installation
CRITICAL WARNING
Always attach the antenna BEFORE powering on the gateway. Operating a LoRa gateway without an antenna can permanently damage the radio transceiver.
- Locate the RP-SMA antenna connector on the gateway
- Carefully screw the antenna onto the connector (clockwise)
- Hand-tighten only - do not use tools
- Position antenna vertically for omnidirectional coverage
Step 3: LED Indicators
| LED | Color | Status |
|---|---|---|
| Power | Green (solid) | Power connected |
| System | Green (blinking) | Normal operation |
| LAN | Yellow (blinking) | Network activity |
| LoRa | Blue (blinking) | Receiving packets |
Registering Gateway on The Things Network
Step 1: Create TTN Account
- Visit thethingsnetwork.org and click "Sign Up"
- Complete registration with your email address
- Verify your email and log in
- Accept the Fair Use Policy terms
Step 2: Register Your Gateway
Gateway Registration Details
- Gateway EUI: Find on sticker or in web interface
- Gateway ID: Choose unique name (e.g., "my-lps8-home")
- Frequency Plan:
- Europe: EU 863-870 MHz
- North America: US 902-928 MHz
- Asia: Check local regulations
Network Configuration
Access the Gateway Web Interface
Find your gateway's IP address using your router's admin panel or a network scanner, then:
- Open browser and enter the IP (e.g.,
http://192.168.1.150) - Login with default credentials:
- Username:
root - Password:
dragino
- Username:
Security Note
Change the default password immediately after first login to prevent unauthorized access to your gateway.
Configure TTN Connection
Navigate to LoRaWAN → LoRaWAN and configure:
Service Provider: The Things Network V3
Server Address: eu1.cloud.thethings.network (for Europe)
Server Port Up: 1700
Server Port Down: 1700
Frequency Plan: EU868 (or your region)
Click "Save & Apply" and wait 30-60 seconds for the gateway to restart.
Testing Gateway Connection
Verify TTN Console Connection
- Return to TTN Console
- Navigate to your registered gateway
- Click "Live data" tab
- Look for "Gateway status received" messages every 30 seconds
Success Indicator
If you see status messages and a green "Connected" indicator, your gateway is properly configured!
Antenna Placement Optimization
Indoor Placement
- Top floor, near windows
- Away from metal objects
- Antenna vertical
- Expected range: 1-3 km urban
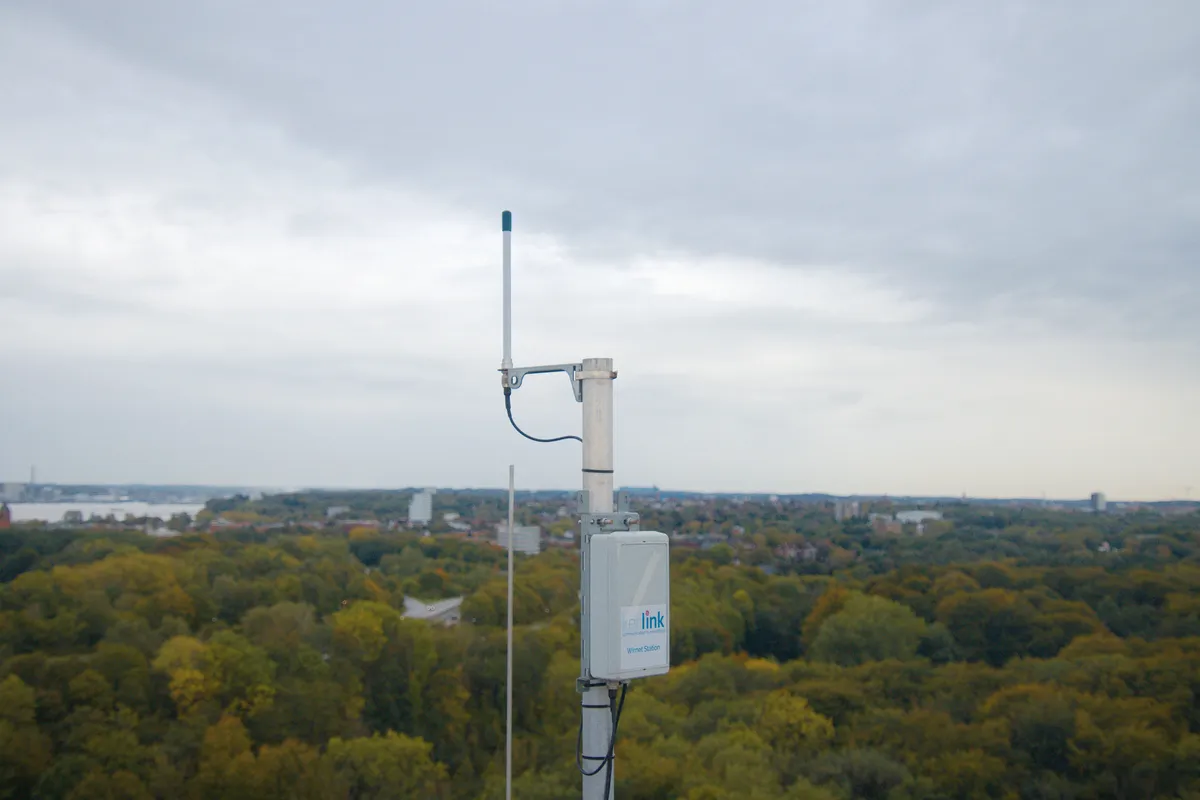
Outdoor Placement
- Roof or elevated pole
- Clear line-of-sight
- Weatherproof enclosure
- Expected range: 5-10+ km
Troubleshooting Common Issues
Gateway Not Connecting to TTN
- Verify Gateway EUI matches TTN registration
- Check server address (eu1.cloud.thethings.network)
- Ensure UDP port 1700 is not blocked by firewall
- Power cycle the gateway
Can't Access Web Interface
- Verify same network as gateway
- Try default IP: 10.130.1.1
- Disable firewall temporarily
- Factory reset (hold reset 10 seconds)
No Packets from Devices
- Check device DevEUI and AppKey on TTN
- Verify same frequency plan
- Test with device very close to gateway
- Check device batteries
Next Steps
Ready to Build IoT Applications!
- Deploy sensors: Add Dragino LHT65, LSE01, or other sensors
- Build dashboards: Use Node-RED, Grafana, or TTN integrations
- Expand coverage: Deploy additional gateways
- Join community: The Things Network forums
For more advanced tutorials, check out our articles on smart agriculture with LoRaWAN and building a weather station.
Frequently Asked Questions
What is the default IP address of Dragino LPS8 gateway?
The Dragino LPS8 typically obtains an IP address automatically via DHCP from your router. If DHCP is not available, some models default to 10.130.1.1. Check your router's connected devices list to find the assigned IP address.
Can I use Dragino LPS8 with a private LoRaWAN server instead of TTN?
Yes, the Dragino LPS8 supports multiple network servers including ChirpStack, AWS IoT Core for LoRaWAN, and other Semtech Packet Forwarder compatible servers. Simply change the 'Service Provider' setting in the gateway configuration to 'Custom' and enter your server details.
How many devices can one Dragino LPS8 gateway support?
The LPS8 is an 8-channel gateway that can theoretically handle thousands of devices, depending on how frequently they transmit. With devices sending data every hour, a single LPS8 can easily support 1000+ sensors. The actual limit depends on total message volume and network congestion.
Do I need to configure firewall rules for the gateway?
The Dragino LPS8 needs outbound UDP traffic on port 1700 to communicate with the network server. Most home routers allow outbound UDP by default. If using a corporate firewall, ensure UDP port 1700 is allowed for outbound traffic to your network server address.
Can I power the Dragino LPS8 with Power over Ethernet (PoE)?
The standard LPS8 does not support PoE and requires the included 12V DC power adapter. However, Dragino offers the LPS8N model which includes PoE support, making deployment easier in locations where power outlets are limited.